Windows NVR setup
Windows NVR Setup: Install OmniNVR and Test Camera Recording
Install OmniNVR from the Microsoft Store, connect one compatible camera, verify recording and playback, and test power, storage, and restart behavior on Windows.
1. Prepare one camera and the recording PC
Use a supported Windows computer with a stable network connection, mains power, and sufficient free disk space. A wired connection makes the first test easier to diagnose. Keep the camera and PC on networks that can reach each other; guest Wi-Fi and isolated camera VLANs can block discovery or streaming even when both devices have internet access.
Collect the camera model, firmware, IP address, a permitted camera account, and the manufacturer's RTSP or ONVIF instructions. Enable the required local protocol if the model supports it. A brand name alone does not establish compatibility, especially for battery or cloud-only cameras. Check the camera compatibility checklist before buying additional cameras.
2. Install the official Windows application
Open OmniNVR in the Microsoft Store and confirm the publisher is Tardis Labs. Follow the Store installation flow on the intended PC. Check its current system requirements and availability for that device rather than relying on a Windows version or processor assumption from another app edition.
Launch the installed release and review the available recording controls and purchase terms. Continuous recording requires Pro according to the current listing. Confirm that entitlement before planning an overnight continuous test. This guide does not assign an unverified camera limit, trial period, minimum Windows version, or exact button sequence; those details must match the current release.
3. Add one compatible local stream
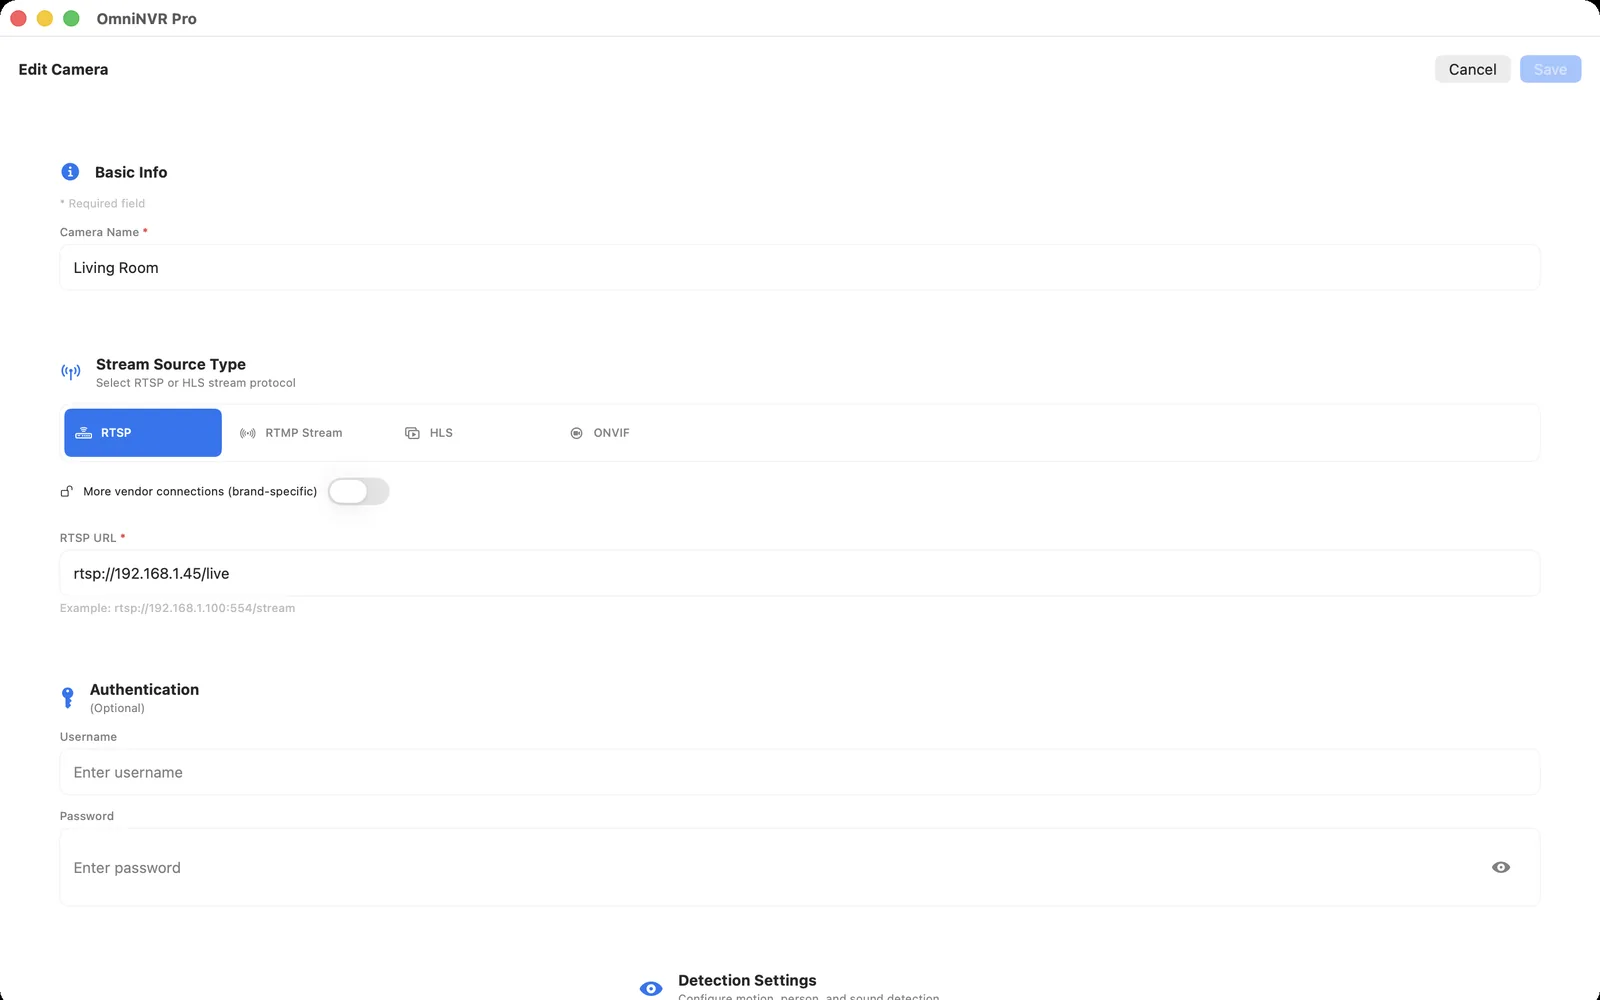
Use the camera connection methods exposed by the installed Windows app. If ONVIF discovery is offered, identify the intended device and media profile carefully. If using a direct RTSP address, obtain the path from the camera manufacturer's model documentation. Use the camera's local account rather than assuming its cloud-app account will authenticate.
Confirm that the live image belongs to the correct camera, moves normally, and has the expected time and orientation. Test any required audio separately. If a stream fails, check reachability, credentials, enabled protocols, codec, and camera session limits before adjusting unrelated Windows settings. A successful picture proves a connection; recording and playback still need their own test.
4. Record a known event and play it back
Choose a recording mode actually offered by the Windows release and confirm any Pro requirement. Note the start time, then create a recognizable scene change: walk through the frame or briefly show a card with the time. Let the test run long enough to create useful footage, then locate and play back the recording through the application's released workflow.
Check both before and after the scene change, not just a thumbnail. Confirm the image is moving, the timestamp is usable, and the footage matches the intended camera. Preserve a test clip if the installed version offers that workflow. Write down any required manual steps. Do not assume that Mac export, event detection, storage destinations, or timeline controls also exist on Windows.
5. Give recording a storage and power budget
Measure how much space the first recording consumes and project the intended retention period. At a sustained recorded bitrate of 4 Mbps, one camera produces roughly 43.2 GB per day in decimal units, before overhead. Real scene activity and camera settings can change this figure. Keep disk headroom for Windows, application data, and temporary work.
Confirm where the installed app stores footage and which retention or destination controls it actually provides. Never test disk-full behavior using important files. Review Windows power settings so the PC remains awake during its recording duty; screen-off and system sleep are different settings. On a laptop, test the real lid, charging, and battery conditions instead of assuming that closing the screen leaves recording active.
6. Test interruption and restart recovery
While recording, briefly interrupt the camera's network connection and then restore it. Check that live video returns and inspect footage on both sides of the interruption. Next restart the camera, then the application, and finally the PC during a planned test window. Record exactly which actions are needed to resume the chosen policy.
Do not assume Windows service operation, automatic login, or automatic recording after reboot unless the release documents and demonstrates it. Check timestamps after each restart and look for unexpected gaps. Repeat with normal foreground applications running if this is a shared PC. A task that works only with the installer watching is not yet proven for unattended use.
7. Expand gradually and document the handoff
Add the remaining cameras in small groups while monitoring storage growth, responsiveness, and recording continuity. Retrieve yesterday's known event while current recording continues. Keep a simple record of app and Windows versions, camera firmware, connection method, selected streams, recording policy, and recovery steps.
Decide who checks recorder health and preserves important footage. Keep camera services on the local network and plan remote access separately using the remote-access guide. If the installed Windows workflow does not meet a required recording or review task, compare alternatives in the Windows NVR software guide before committing the whole system. This is a setup procedure, not evidence that a particular camera or unattended workload has already passed it.
Frequently asked questions
Where do I download OmniNVR for Windows?
Use the official Microsoft Store link in this guide and confirm Tardis Labs as the publisher. Check the listing's current device requirements and install it on the PC that will perform the recording.
Do I need Pro for continuous recording?
The current Windows listing places continuous recording behind Pro. Review the current purchase terms and verify the entitlement in the installed application before planning continuous operation.
Can I follow the Mac setup instructions on Windows?
Use the controls documented and present in the Windows release. The product family spans several platforms, but exact recording modes, storage options, review tools, and system behavior can differ.
Will recording continue when my Windows PC sleeps?
Do not plan ordinary camera recording around a sleeping PC. Review power and sleep settings, distinguish screen-off from system sleep, and test the exact desktop or laptop conditions used at the site.
What should pass before I add all cameras?
One real camera should complete live viewing, a known-event recording, playback, and planned interruption and restart tests. Confirm storage growth, licensing, and all manual recovery steps before increasing the workload.
Sources and further reading
Choose Windows or an Apple device for local recording.
OmniNVR is available on Windows, Mac, iPhone, iPad, and Apple TV. Recording modes, purchase requirements, storage, and review tools vary by released platform build.